Sometimes, when you’re trying to access cPanel an error message stating “IP address has changed” appears. In most cases, this message is displayed when you establish a connection while using a network that has strict firewall rules. Or, you use a virtual private network (VPN) that occasionally changes your IP address.
As a security measure, cPanel doesn’t tolerate dynamic IP addresses. To fix this issue, you can use a custom tool called a cPanel proxy.
The purpose of the cPanel proxy tool is to give access to cPanel including webmail, WHM at port 80 acting as a proxy. You can use cPanel proxy tool on VPS, Reseller and the server owner. cPanel proxy is helpful if you are using a dynamic IP address. Sometimes you will get the error “IP address has changed”, so it is highly recommended to use cPanel proxy tool due to some security issues in cPanel. You can refer the following steps to know more details about cPanel proxy.
Things needed for this tutorial:
- Access to your cPanel account
- cPanel Proxy tool
Step 1. Delete Existing Default cPanel DNS Entries
- Login to your cPanel hosting account.
- Find the Zone Editor tool and open it.

- You’ll get a window that has a list of your domains. Click Manage next to the one you want to fix.

- It will direct you to a new window that has a collection of DNS records. Because we want to fix the cPanel login issue, the cpanel.yourdomain.com DNS record is the one to look at. Find and delete it.

Note: If you have the same problem when accessing Webmail or WHM, you can also delete the appropriate DNS records here.
Step 2. Create a New Subdomain for the cPanel Proxy
- Now go back to cPanel’s main dashboard, find the Subdomains tool and open it.

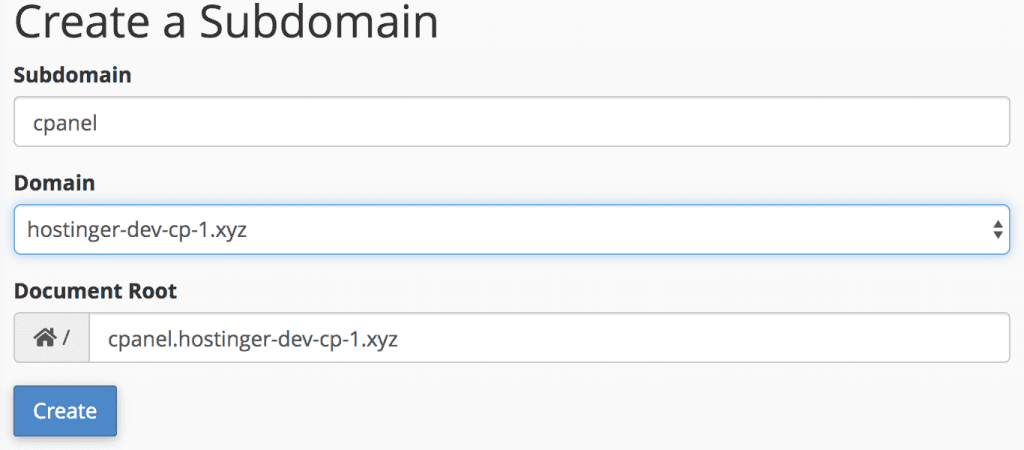
- The subdomain list should be empty at the moment. Now, in the Create a Subdomain form, write cpanel as the subdomain. The other fields will automatically be filled. Click Create. And when finished, click Go Back.

Note: If you previously deleted the Webmail and WHM entries, you might also create the subdomains named webmail and whm respectively.
- You should see the newly created subdomains on the list. Remember your cPanel link name in the Document Root section, as it’s where you’re going to navigate to for the next step.

Step 3. Download, Upload and Extract the cPanel Proxy
- Go to the cPanel proxy homepage and download the tool.

- Go back to the cPanel main dashboard, find the File Manager and open it.

- From the folder tree section, navigate to your cpanel.yourdomain.com. Once you’re inside the directory, click the Upload button from the navigation bar.

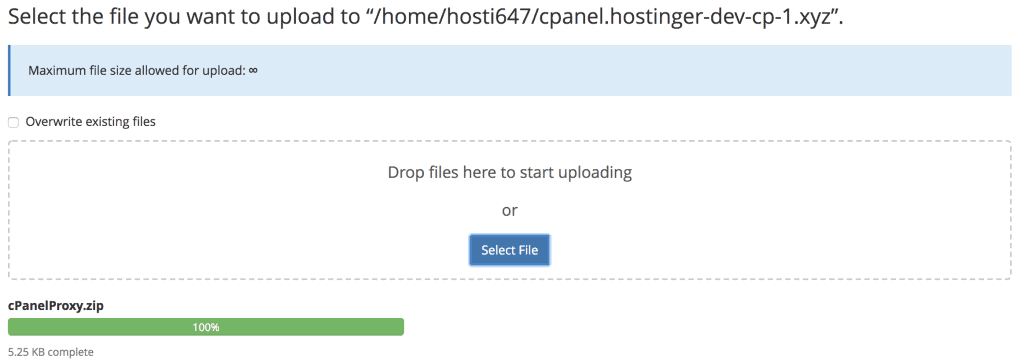
- It will open a new window. You can either drag and drop the cPanelProxy.zip file directly or select the file to upload it. Once the upload is completed, you can click the Go Back to link.

- Now the cPanel proxy tool should be placed in the directory, and the only thing left is to extract the file. You can either right click the file and choose Extract, or click the Extract button on the toolbar.

- A confirmation window will pop up as soon as you click the Extract. Here you can review the execution path. Once confirmed, click the Extract File(s) button.

Protip: Repeat Step 3 if you have the same issue with Webmail and WHM, and extract the tool in the appropriate directory.
You have successfully installed the cPanel proxy tool, helping access your cPanel account with ease. You can also login to the cPanel window directly, by entering cpanel.yourdomain.com in your browser.


